Showing posts with label lorac. Show all posts

Friday, September 18, 2015

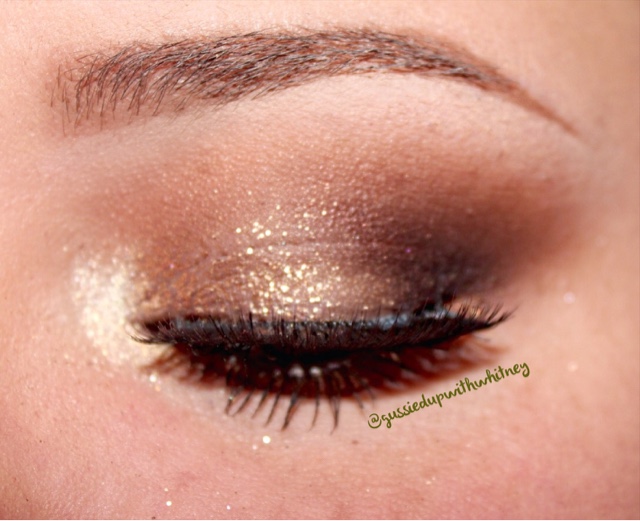
Glitter & Gold Eye Look

So, I meant to have this one up a few days ago because I got such positive feedback for it on my Instagram and Facebook, but life got in the way (and it does sometimes). 

Basically, just like my previous post said, I used the Lorac Mega Pro from last year's holiday season, because I haven't used it quite enough since purchasing it and it's such a beautiful and versatile palette. People basically raved for weeks about how Lorac Cosmetics sucked if he/she didn't get one because the quantity was so limited. I camped out like a total fan girl, so I was fortunate enough to get mine. 

I'm just going to hop right into it, so I don't have to ramble anymore than absolutely necessary. 

1. So, naturally I had already filled in my bows with my ABH Dip Brow "Caramel" ($18) and primed my eyes. So for the first step in the photo, you'll see that I am applying a transition shade (which I usually always do first). I used the shade "Camel," which is a nice tan brown shade to buff out the crease and diffuse the darker colors we'll be applying later on. 
  
2. I used this gold crayon I got from, I believe, an Ipsy bag and it is by TreStique in the shade "Venetian Gold." You can also use a gold MAC Paint Pot, a NYX Jumbo Eye Pencil, or even a Maybelline Eye Tattoo. Just use what you have. But my purpose for prepping my lid with this is to give us a nice base to apply our gold shadow and make it stand out more. 
3. I think I missed a step with my photos, so I'll just explain to you what I did next: 
  • I packed the shade "Copper" onto the inner portion of my lid with a shader brush and "Sienna to the outer part. 
  • And then started to blend out the outer edge with the shadow "Sienna," taking that further into my crease. 
I also chose to deepen up the outer "V" of my eye with the deep brown, matte shade "Espresso." This just gives more dimension to the look. 
4. I then packed on some gold glitter from a previous MAC holiday collection, so I don't believe it's available now. I need to get some actual glitter glue, but this time I used my finger to apply a drop of Makeup Forever Aqua Seal ($21) to my lid and then tapped the glitter onto that inner half where the gold shadow is concentrated.
5. I wanted this look to still be pretty bright, so I used a pencil type brush and my MAC Fix+ to apply the gold "Copper" color to the bottom lash line. And I used my finger to tap a bit of the shade "Opal" onto the inner corner of my eye. 
6. For the last major step, I defined the eye a little more by applying a brown pencil liner to my water line and tight line. And after applying a quick coat of mascara, I put applied some dramatic lashes to finish off the look. 
I really hope you all like this look as much as I enjoyed putting it together! I wish I'd had a better glitter glue product, so I could have packed it on more dramatic, but I guess I'll know to get some for next time. 

Let me know if you all have any questions, comments, suggestions, etc. 
Sunday, August 9, 2015

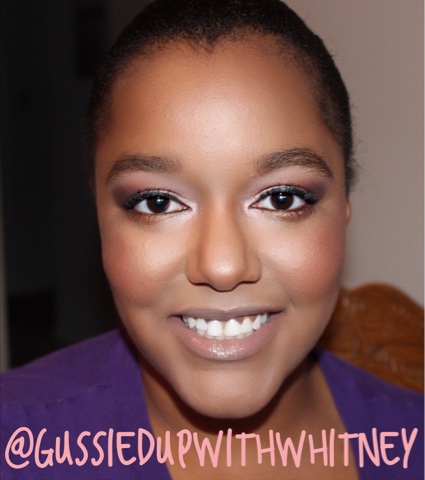
Dewy Everyday Makeup for Deeper Skin Tones

I guess there's a first for everything, and it just so happens that Tekara was my first "woman of color." I am looking forward to getting as much experience with varying skin tones as I can. I was a bit nervous like I am with every new client I work with, but I am oh so thankful to her for being such a good sport (as my guinea pig) and for letting me use her face for practice! 

From here on out, I plan to have an "I can" attitude regardless of the person's face shape, hair/eye/skin color, or otherwise. 

Girlfriend has such a rich, warm skin tone, so it was really fun to work with. I think overall, deeper skin-tones look just so radiant and beautiful when highlighted. The darker skin and the highlighting shade just contrast a lot more and really illuminate the skin. I was able to make her skin look so dewy and fresh.
Also, since this was my first time working with a deeper complexion, I didn't want to overdo the eye makeup. I wanted to do something I might have done on lighter skin tones. It really helped me to see that I can make just about any look work well on any skin shade. 

In fact, I think the bronze shade I used really just glowed and stood out against her skin, as well as around her eyes. 

She also normally wears glasses, so I wanted to take a glasses shot to show that your makeup can still look fab even with your spectacles. 

If you have any questions on my techniques or particular products, or just want to make post suggestions, feel free to leave me some comments! I'm open to new things.  :) 


Products Used:
Face Primer: Skindinavia The Makeup Primer Spray  $35-49
Eye Primer: Urban Decay Primer Potion   $20
Foundation & Concealer: Graftobian Hi-Def Glamour Creme Foundation in shades "Midnight Marigold" "Deep Xanthe" & "Golden Sunset"   $19.99 each 
Setting Powder: Coty Airspun Loose Face Powder in "Translucent Extra Coverage"  $7
Blush: NYX Cosmetics Powder Blush "Pinched"  $5
Eyeshadow: 
  • stal Scents Hot Pot in "Chamois Nude"  $1.95
  • Jaclyn Hill Favorites Palette by Morphe Cosmetics (no longer available) shades es20, es13, es16, es24, es71
  • Lorac "The Resort Palette" (no longer available & no shade names)
Eye Liner: L'OREAL Infallible Laquer Liner 24HR "Blackest Black"  $9.95
Mascara: Maybelline Volum' Express The Mega Plush Mascara "Blackest Black"  $7.49
Brows: ABH Brow Pro Palette   $88
Lip Liner: NYX Cosmetics Lip Pencil "Nude Beige"  $3.50
Lipgloss: NYX Cosmetics Butter Gloss "Creme Brûlée"  $5
Setting Spray: UD All Nighter Makeup Setting Spray  $30

Sunday, July 12, 2015

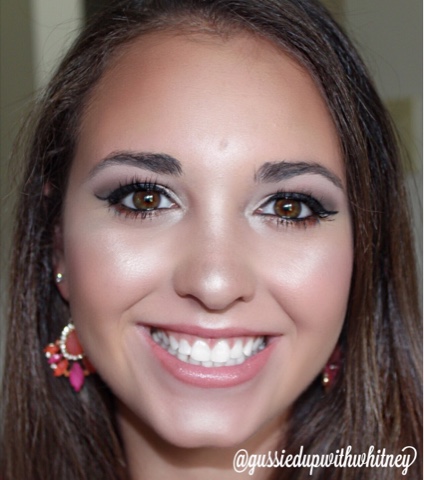
Brown-Eyed Beauty Makeup

Today's makeup was just a random choice. I wasn't sure what I wanted to do. And to tell you the truth, I woke up this morning, opened up a few palettes and swatched some shades before making up my mind. Brown eyes are so versatile. There are so many directions you can take with makeup. It's always so fun to me to come up with ideas ahead of time, all the while discovering new color combos. 

Makeup is my art. 

As usual, I'll be listing all of the products at the bottom of this post.. But would you believe it if I told you I used shades from three different palettes for this eye look? 

Shout out and a big "Thank You!!" to Kelsey for offering to be a model for blog portfolio! 

Many times when I'm doing work with clients, I run out of time and don't have a chance to get proper photos for my portfolio. So, I've had a few girls agree to work with me so I can get some detailed photos of my work and a good basis for the start of my professional portfolio. 

For this look, though, I did a bright day time eye with some smokiness. The black winged liner and the blackened waterline make her eyes POP without making them appear too small or closed off. Lining brown eyes with black liner tends to make the warm honey brown pigmentation in most all brown eyes stand out. 

She just returned from the beach, so I tried to give her a nice, dewy glow to her face to accentuate her beach tan. She has a great facial structure, so I only lightly contoured the natural shadows of her face to bring some warmth back in to complement the dewy highlights. 

And lastly, I applied a natural pink lip to yet again, give the face a "fresh-faced" appearance. 

Products Used: 
Primer: Mirabella Prime  $29
Eye Primer: Urban Decay Primer Potion  $20
Foundation: Graftobian Hi-Def Glamour Creme Foundation shades "Sunlit Linen" "Desert Sand" & "Buttermilk"  $19.99 each 
Setting Powder: Ben Nye "Buff" Luxury Powder  $12-20
Bronzer: NYX Cosmetics Highlight & Contour Pro Palette  $24.99, currently on sale for $14.99
Blush: Jordana Powder Blush "Rose Silk" $5.79
Highlighter: E.L.F. Studio Baked Blush in "Pinktastic"  $3
Eyeshadow: 
Eye Liner: L'OREAL Infallible Laquer Liner 24HR "Blackest Black"  $9.95
Mascara: UD Perversion Mascara  $20
Lipstick: E.L.F. Studio Mineral Lipstick "Party Pink"  $5
Lipgloss: NYX Lip Butters "Eclair"  $4.99, currently $2.99
Setting Spray: UD All Nighter Makeup Setting Spray  $30

Thanks to all of you for your constant support and avid interest in my work! I will have more upcoming posts like this for my portfolio in the near future, so stay tuned!

xx 

Wednesday, June 3, 2015

The Resort Palette by Lorac

This limited edition palette is one I am very excited to report on. I had seen it a while back on someone's Instagram or maybe even on a blog post, but was just able to get my hands on it recently. The palette is no longer available online since it was part of Lorac's Spring 2015 Collection. I ordered mine from HauteLook, so it's not listed on their site any longer.

Still yet, I have to brag on yet another Lorac product that I was impressed with. I don't think I've tried one Lorac product that has disappointed me. They have some of my all time favorite shadows. The buttery texture is just downright perfect, and the pigmentation for all of their powder products--UNREAL. 

Of all of the spring/summer palettes I've come across thus far for 2015, this package design is my favorite. I love the teal, gold and white design on the outside. I get all kinds of excited just from looking at it. 

I'll also make it known that this palette is the typical cardboard design with a magnetic closure.


The first thing I noticed when I saw this palette online was that it was very travel friendly because it comes with a highlighter, two blushes and a bronzer. It's cool since a lot of palettes don't include that, or if they do, the palette as a whole isn't the best quality. 

The highlight shade comes off as a white with a silvery sheen, which everyone can use. The bronzer is my favorite type of brown with an ashy hue. More people seem to lean towards the ashy, taupe-y browns. 

And lastly, the two blush shades are very different from one another. There's the bright coral on the top right and the deep mauve shade on the bottom row, both of which are very flattering. I've even layered the two a few times for a mid-tone blush on the cheekbones.
With Flash

And as you can see, the colors are very pigmented. The black is like WOW. The first two on the top row just don't show up well because they are so similar to my natural skin color, but do well on the lids after prepped with a primer. 

I like to apply my primer, then apply a white shadow over the entire lid to set the primer and give me a nice, flat white base to start on. It's kind of like giving yourself a blank canvas. I do that every single day when applying makeup, but it especially helps to showcase the actual pigmentation of the paler shades that would not show up well on your skin otherwise.   

Without Flash


For those of you who didn't get your hands on this palette, BOOOO! I hate that. I wish I could personally hand out a whole lot of them to everyone who wants one or who I know would appreciate one. 

Honestly, Lorac has done it again! I've tried many brands of eyeshadows-- both high-end and drugstore, but Lorac is one of my all time favorites. I've not used one shadow of their shadows that fell short of my standard. I give this palette an A for versatility, for excelling my expectations in pigmentation, for the neutral shades provided for everyday or dramatic use, for the fact that it has one of the blackest blacks ever (which is a huge plus for a palette), and for the beautiful palette design.